

Smangerer
-
Posts
26 -
Joined
-
Last visited
Content Type
Profiles
Forums
Gallery
Posts posted by Smangerer
-
-
$4.09 20 miles out of SF and in the city... about $4.50. I went to costco today and got $3.99.
I win?
-
-
I think I give up. I had the strut and strut plate replaced on the side that makes the sound as well as 3 other parts which I cant recall at the moment and its still there. This has been 4 trips now 2 of which have put me in a rental for a total of 9 days not including the 2 other days they had the car with out a rental. I really would like this to be fixed but I cant justify any more time for attempts to fix this annoying sound. It could be the deciding factor in weather or not I buy the car at lease end. Do I want to live with this?
-
Has anyone else noticed the instrument dimmer on the left side of the steering wheel does absolutely nothing? I turn it all the way down to all the way up and no change. Maybe I'm missing something?
I believe that that is a maximum-minimum setting. The brightest will always be brightest in full sun. But the dimmest, when the sun is gone, will be determined by that setting. To see your setting effect while setting it you will need to either cover the sensor or do it at night.
-
I've done a little digging and iPhone 4s users may have an easier option. The iPhone 4s using the Apple 30-pin to composite video adapter should be able to plug right into the composite video input. A 3rd generation iPad might also be able to use the same adapter. The adapter is under $50.
For iPhone 5 and 5s (or any iDevice with a Lightning connector), we'll have to use the Lightning to HDMI adapter, then an HDMI to composite converter to convert from digital to analog. The HDMI to composite adapter would then plug into the composite video input. The Apple Lightning to HDMI adapter is $50 and the HDMI to composite (digital-to-analog converter) adapters are around $30.
If somebody has an iPhone and the appropriate adapter(s), I would love to know if you can get video out of it and what it looks like (any letterboxing, orientation, etc.).
If all of this works in Park, the same as hooking up a DVD player through the composite video, then I might consider the roughly $350 investment in a MFT LockPick.
I have a 5s and have purchased the exact setup you mention. I did it for a couple nights of Netflix and it works fine. However, there is a mess of "cablage" which would get annoying fast if you wanted it "perma-instaled". I took a look at Waze which worked, but usability fell to zero as you cannot use the cars screen for input to your devise, or for anything else. One thing to note when sending video out of phones... some apps limit how video can be displayed and will not allow it over said adapters.
-
well google bought waze so all of waze data is now in google maps. I find it the most accurate and has the best display. Also you can set it up to use the phone speakers for direction (which I prefer) instead the car speakers.
-
-
Got the Cmax back tonight. The noise is definitely gone......hooray. The strut and strut plate on one side was replaced and the noise stopped. Would show itself more when hotter weather was prevalent.
The bouncing is not resolved. Mine does it. A new one does it. Another new one doesn't do it. This is another saga unsolved, but the rattling is fixed and that is a great thing.
I have had a very similar experience. They have replaced a support arm, a Damper, and I guess they have one more piece on order. Its the same noise you described. Its been there for over a year now and 3 trips/ attempts to be fixed. I have one more part on order. The first attempt they replaced a support arm then coated the damper (after pinpointing the sound there) with a rubber lube but it only worked for a week. Then they replaced the damper and now have the arm that attaches to the damper on order. Are the Strut and Strut Plate the exact parts? Im going to show them this info and want to make sure Im telling them the correct info. Thanks and I wish I would have searched this forum for this problem.
-
I just found another option for product.
the "Xb Led" strips caught my eye then I saw the above "x-drl". I may try them out and If I do Ill update.
-
I never have luck with the traditional velcro.
Try this
-
Mine are pointed up. I wanted the white lights but I didnt want to mix up the colors considering my headlights are halogen. If the headlights were hid or led I would have gone white.
-
Thanks for the information Smangerer. I just ordered the True Flex 5.1 inch led light bars from Custom Dynamics. I like the location that you placed the led bar. Did you drill a hole in the lower plastic grill to pass the wires through? I am trying to figure out how to get the wires from the lower grill to the fuse block in the engine compartment. Any tips would be appreciated.
one thing I noticed when I tested these strips is that they have a slight throw up or down depending on how you hold them and they are identical. The reason I mention it is that you will instinctively want to mount them with the wires coming out of the strip to the center for minimal wire exposure. But if you do that, one side will be casting up and the other down. I have both of my strips mounted with the wires going to the right. The one on the right of the car I had to tuck the wires in between the grill and body and back toward the center to the gap.
I doubt that anyone would notice if I had just mounted them but Im a lighting professional and it would have bugged me. Test your lights first and rotate them up and down to get a feel for where the beam is cast strongest.
-
Great, that helps a lot Smangerer. I read that the LED strips have 36 inches of 26 gauge wire attached which is thin enough to fish through small spaces as you did. Do you turn on the LED strips when driving at night with the headlights on or are they too bright to do that?
They are not bright enough to overpower the headlights if thats what your asking. I couldn't say if they are too bright for oncoming or rear view traffic but no complaints yet and having seen some truck lightbar mods, Im on the low end of the offensive scale in comparison.
I leave mine on all the time unless Im parked with accessory mode on for radio or watching netflix or when taking it in for service. The FOB module has a button dedicated to 6 brightness settings but I leave mine on high.
-
Smangerer you must be located somewhere close to Richmond CA since that is where you bought your CMax. Lets hook up, I'm in San Jose near Campbell. Interested?
indeed I am in the area. I treck all over the bay for work but rarely have time to play while out.
As far as your Hella lights vs. the LED strips... if your primary goal is true DRL's then you went the correct path because of the housing and lenses your lights have. They are, Im assuming, rather visible in full sunlight? I wanted that but didn't want to do any drilling so I went with the brightest strips I could (which is accomplished by having shoulder to shoulder diodes). The strips on the headlights are spaced out and since they are not recessed, they disappear in full sun. The lower grills are slightly recessed and therefore kept in shade so better but not aimed with a projector/intensifier.
-
Thanks for the information Smangerer. I just ordered the True Flex 5.1 inch led light bars from Custom Dynamics. I like the location that you placed the led bar. Did you drill a hole in the lower plastic grill to pass the wires through? I am trying to figure out how to get the wires from the lower grill to the fuse block in the engine compartment. Any tips would be appreciated.
I used the adhesive backing on the strips to mount them and I pulled the wire up with a coat hanger. Its hard to describe and I doubt I could get a picture but I tied a loop on the end of the wire and pushed it though a gap on either side behind the outer most grill opening. Now standing with hood open looking down, If you hold your head and a flashlight at an incredibly specific angle you can see the wire loop and with careful movements (think operation) I got it pulled up. Im sure I could have taken the car apart but screw that. I then zip tied the wires along framing over to the fuse side. I used an existing bolt on the frame with extra thread for ground and I tapped the rear wiper fuse for power. It may appear a bit loose in spots but I wanted to be able to pull it all out with ease If I desired.
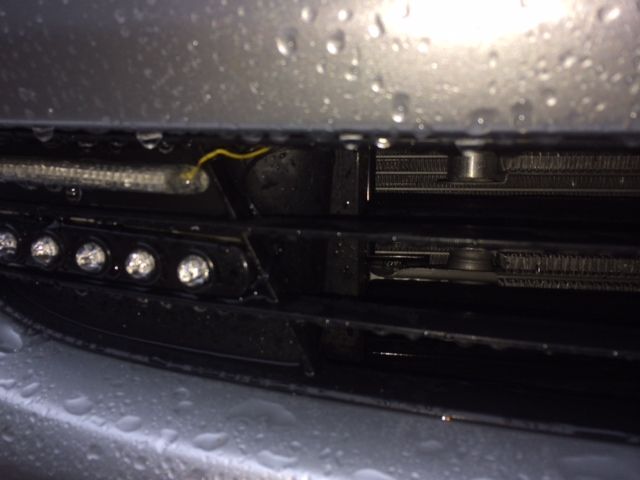
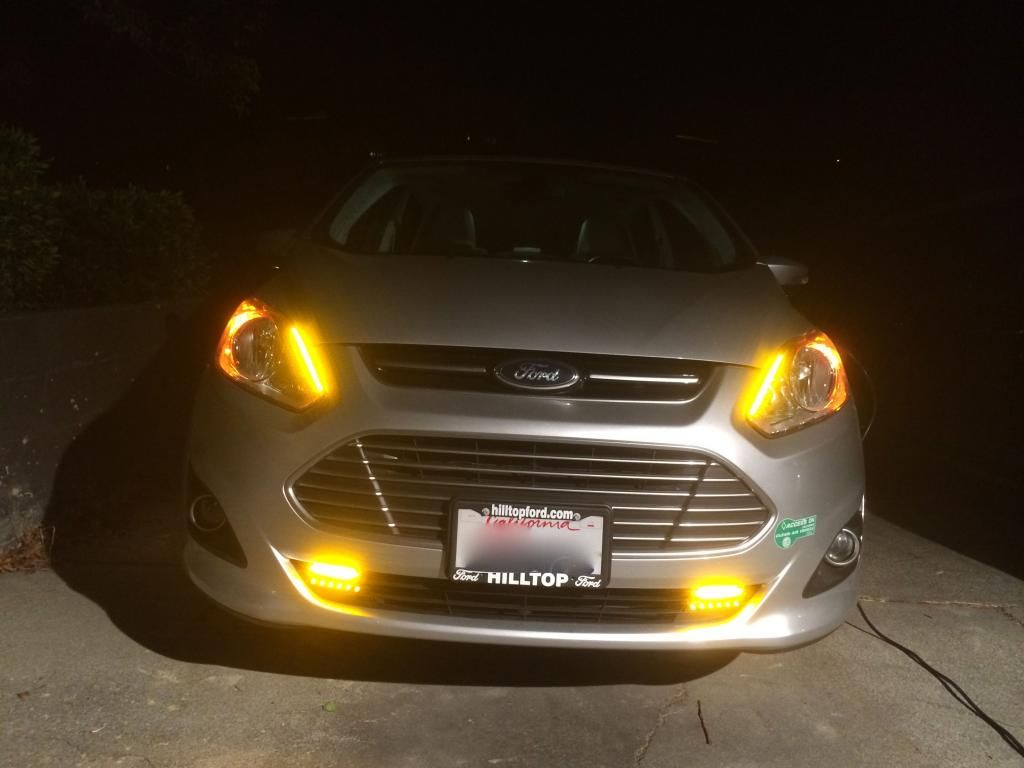
This (kinda) shows the gap. The bottom row of lights is a my cheap first purchase which was underwhelming. I left them in place for the hell of it.
This is looking down from the pull through point. (yellow and black wires center right)
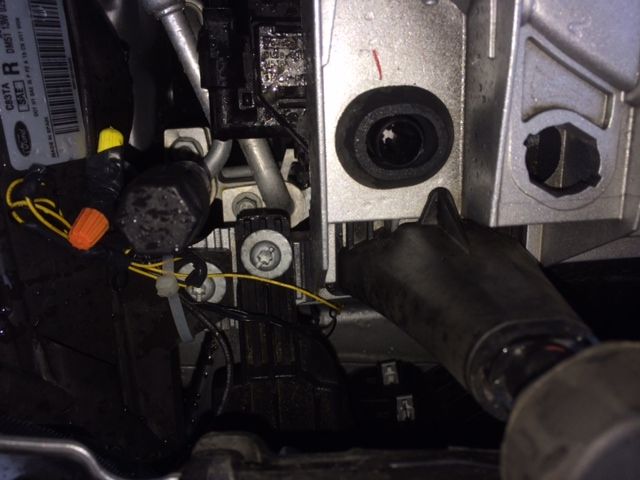
This is the ground bolt I used. I added nuts to sandwich my ground in there. (black wire, center)

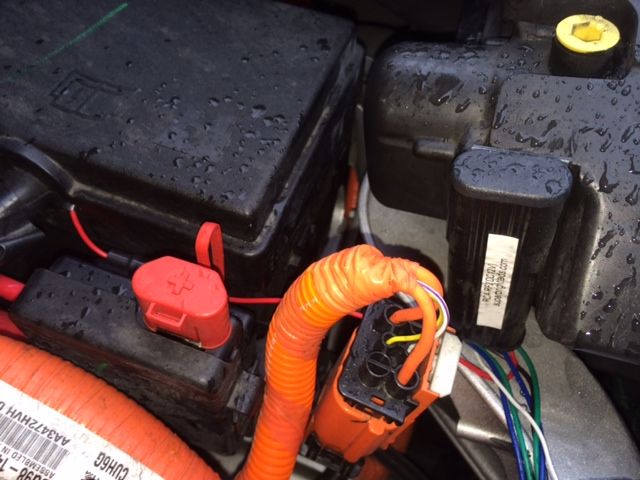
This is the Fob module (right, with blue and green wires) and the power fuse box (left, with red wire) The module has an inline fuse for additional protection.
-
I ran my LED strips to the rear wiper fuse which is always on with ignition. I tossed in a FOB switch in line so I can power them off if needed.
I apologies if this is redundant.
-
It seems clear to me that this adds a NEW rca input (three actually) which is active when in reverse (the other two can be toggled via steering wheel) and there is no need to cut or splice anything. Simple.
Let me know how you opt to run the cables to the rear camera.
Thanks
-
I spent quite a bit of time on the phone today with several ford dealerships and several manufactures of aftermarket integration systems and I thought I would share what I have found. Basically, if ford offered this backup camera as an accessory kit, that means that the factory included the required wiring to make it so. That being said, the backup camera is not available as an accessory and hence this is an indication that ford left out the ability to upgrade. To substantiate my claim, I downloaded the wiring diagrams from fords online resources as well as an install manual for the Nav-tv backup camera kit and what I found right away put the last nail in the coffin. Basically, in the connector that connects into the back of the mytouch unit, there are two pins used for the camera signal, pins 14 and 15. If your C-Max was not factory installed with a backup camera, then these two pins are not there. Following the install guide for the Nav-tv kit, they provide the harness that connects in these to pins and runs to the read of the vehicle. Also, the is a huge harness section that is missing as well. it connects at the connector C237 inside the center console and runs all the way to the lifts and ends at connector C494 which is where you cam hooks in.
Additionally, software flashes are vin tailored and the flash program ensures that your VIN is part of the software upgrade. If your vehicle VIN is not part of the upgrade, it cannot be installed. Therefor, vehicles that had the cam factory installed, had a different trim level inditification as part of the VIN.
After all this today, I have decided to abandon it and go with the nav-tv kitI
Curious... did you read this thread? I suggest you read this whole thread from the top.
-
-
Im just curious why you would want to remove the light? I would say that the third brake light is the most important/effective at getting the attention of the person behind you as it is centered and isn't buried, if you will, by the tail lights at night.
-
I assumed they are flexible to be mounted on the headlights? I looked at both names you posted and I'm not sure which are the ones you used.
I apologize but I left out one site, radiantz.com.
Headlight strips are the "Roachez" from Radiantz.
Lower grill is the denser "True Flex" on the costomdynamics site or "Z-Flex" on the radiantz site. I got the first but they appear to very similar in design and price. These have the LEDS packed in there for maximum punch.
The switch is http://www.superbrightleds.com/moreinfo/installation-supplies/universal-remote-control-with-key-fobs-rgb/1533/3560/
It took me hours to initially find all these sites and products so enjoy!
(PS. I realize the last two links are to the roachez link. It wont let me add new links for the diffrent products. It is the correct website however.)
CustomDynamics.com
Radiantz.com
SuperBrightleds.com
-
So you got the Model 301 listed at the top? And It appears you used vehicle power after-all. You mentioned that you could use the lockpic as a power source, could that have worked or did you just get impatient? I am almost certainly going to do this.
-
They are mounted on the outside of the housing with 3M adhesive. The ones on the bottom are stuck on as well. I could have gotten any color I wanted. The two sites I bought from are SuperBrightLEDs.com and CustomDynamics.
-
I did a similar mod. I went with Amber Leds to match the non HID lighting. I used the rear wiper fuse to provide power as it is always on when the car is on. I also added a wireless FOB switch to turn them off if needed. That switch also has several strobe programs as well as a dimmer built in, not that I would ever use them.

Rattles in Front Suspension
in Brakes, Chassis, Park Assist & Suspension
Posted
I am happy to report we have finally solved my creaking issue!
It ended up being a poor pinch weld on the driver side wheel well area. The dealer finally got the right guy on the job. They reenforced the weld three times over and I haven't had that annoying creak since.
I'm so glad I kept at it. I finally have my new car!