


vonsche
-
Posts
13 -
Joined
-
Last visited
-
Days Won
3
Content Type
Profiles
Forums
Gallery
Posts posted by vonsche
-
-
Yes I've tried adjusting it on the stalk at all different levels. Just seems to not work well all around and even at the most sensitive level I've had it not even activate.
-
Have others experienced issues with the auto wipers working poorly? I've noticed whatever setting I have it on a lot of times they don't even come on even when the window is blindingly covered in water or they come on too infrequent. Really annoying. I've made sure the area in front of the sensor is clean and still seem to have poor behavior with this. Wish the car just had normal intermittent settings. Any ideas of fixes for this before I contact dealer to check it out under warranty?
-
Brought mine to dealer to get this fixed. After some resistance about it being from aftermarket lights, I explained to them this has been an issue since I bought it even with regular headlights and that there is a way to flash it in to the BCM and showed them forum post from here of others that did so. A day later they emailed me saying they figured it out and reprogrammed it. Works great. They did not charge for this. Car was not from Canada, but was previously a rental.
-
Hey, thought I'd post a quick how to on how to install LEDs in the vanity mirrors in the sunshade as it wasn't quite as easy as most vehicles where you pop the lens off and thats it.
Step 1. With a normal size flathead screwdriver gently pry up about 1" in on the edge of the plastic part of the mirror assembly in the visor. The plastic assembly snaps in so you will hear an audible click as you pop it out.

Step 2. Don't have a pic, but they'll be a metal reflector thats held in with plastic rivets on the inside of the mirror behind the clear plastic lens and where the bulb sticks out. You'll need to gently pry this off with a screwdriver in order to gain access to the bulbs.
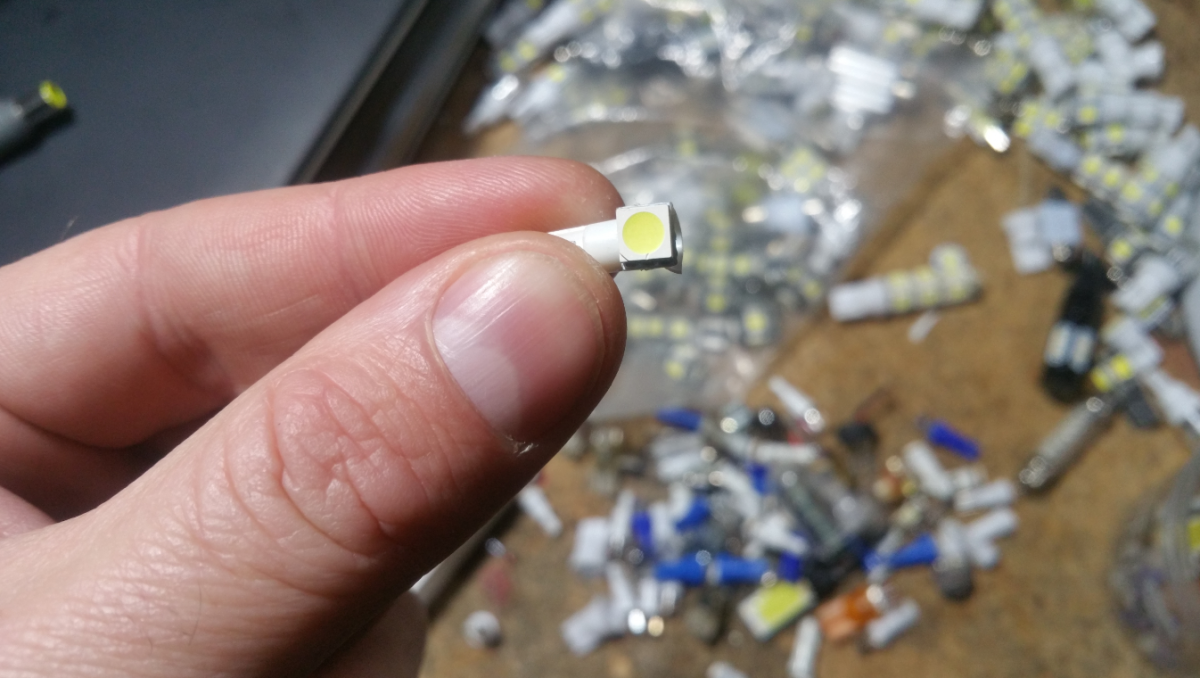
Step 3. The bulbs are base type T5. You can get ones off ebay for like 10 for a $1. They usually are used for gauge cluster bulb replacements. You might even be able to find right angle ones already rather than doing steps 4 & 5. https://www.ebay.com/itm/10x-T5-LED-White-Dashboard-Gauge-Wedge-Instrument-Panel-Light-Bulb70-74-1SMD/202100536278?hash=item2f0e2173d6:g:rmQAAOSw-xVZ-SyG&vxp=mtr
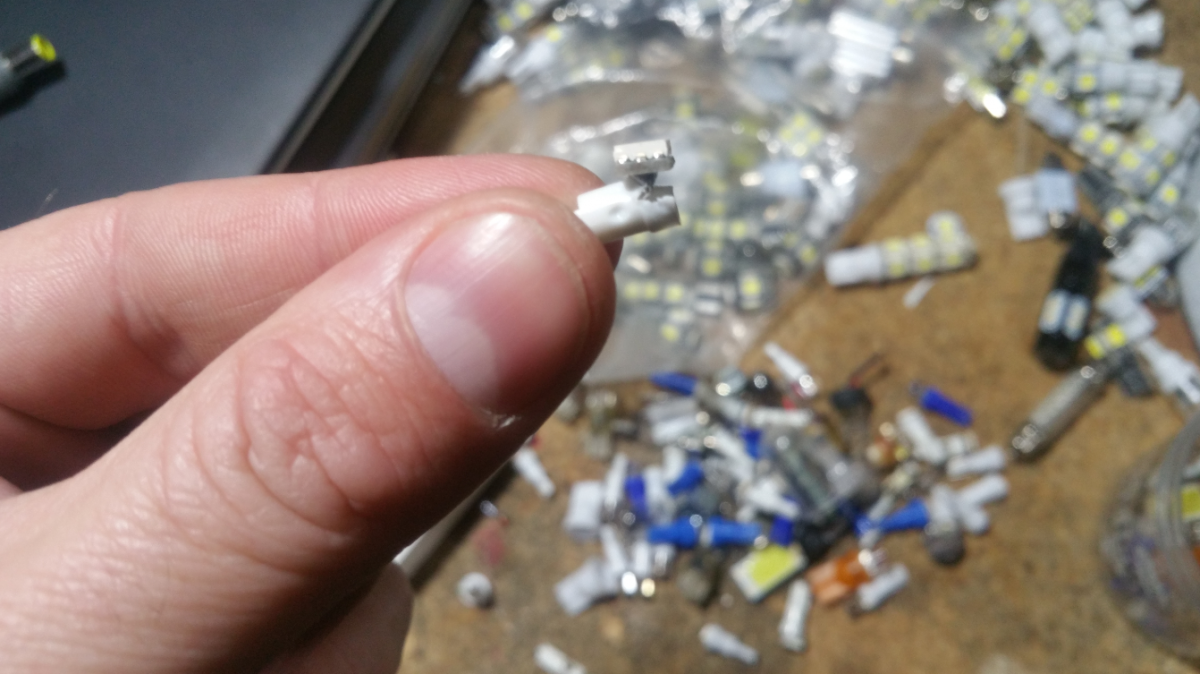
Step 4. I had some of the regular T5 bulbs listed above spare. I used a pair of wire snippers and carefully cut away part of the plastic on the base of the LEDs (see pics).


Step 5. I gently pried the LED itself 90 degrees downward. Keep in mind most LEDs are polarized, meaning that + and - of the LED does matter. If you do all this and plug it in and it doesn't light up, flip the bulb 180 degrees. I got lucky and all 4 I did this too (cutting half the base plastic away) I did on the correct side of the bulb. Since they are so cheap if you screw it up then grab another bulb.
Step 6. Pull stock bulb out and insert LED.
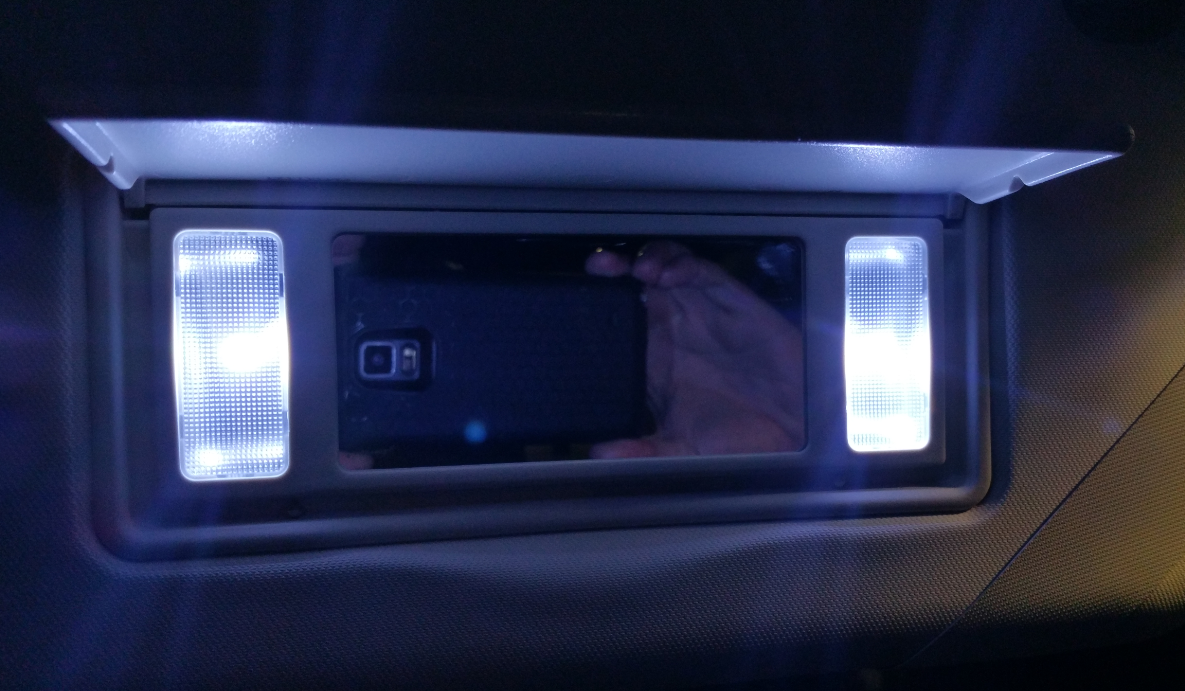
Step 7. Test both LEDs light up by opening vanity mirror. Give it a gentle shake making sure there's no flickering to make sure there's no loose connections.
Step 8. Push the metal reflector assembly back in. The plastic rivets that used to hold them in are now broke but it'll still squeeze in.
Step 9. I used hot glue and put some globs on the corners of the reflector part to hold it against the plastic of the vanity mirror. I initially didn't use any glue and just snapped it in, but found quickly the opening and closing of the sunshade cause them to bump loose and rattle around.
Step 10. Snap the plastic vanity mirror back into the sunshade visor. I applied gentle but firm pressure on the plastic on each side until I heard an audible "click" using my other hand to apply counter pressure against the back of the sunshade.
Done! No soldering, removal of sunshade, or removal of contact points on mirror required. Took about 10 mins to do both vanity mirrors.

-
Connected a ballast and bulb from amazon kit. Light flickers and then shuts off. Probably just need a relay wired up to it. The system doesn't like the initial draw of electricity and stops it. Or doesn't like the latent drop. Super easy and not invasive. Will let you know the results.
Use these with any HID / LED kit on any vehicle to stop flickering and be able to use lights for DRL. Worked on 2016 Cmax and 2016 Colorado.
-
I noticed the same thing. Researched it on google and it said that its the solid state relays in newer vehicles. If you wait 10 minutes the car shuts off all electrical power and that ghosting goes away. I tried several LEDs in the lic plate and noticed some are worse than others. Probably because some have more resistance. Sure enough I went out there in a little bit and the "ghosting" was gone. Probably some expensive LEDs that will adjust for this out there. I don't mind it, most of the time I'm parked around street lights anyway and you can't see it.
This was from a Jaguar forum:
Hi...not to worry. This is because Jaguar (and many others) have converted from normal electromechanical relays to solid state relays. Solid state relays don't completely cut off current flow. when you install LED's, there is a diode effect that causes a very small amount of current to flow. I converted my 2009 to 2011/12 style taillights and all LEDs for exterior lights, and see this effect. As soon as the (10 minute?) period where all electrical flow is cut off, they'll do that. After 10 minutes will quit. No harm to battery or circuit (I replaced AGM battery about two years ago, still going strong). Regards...ct
-
Pffff hahahaha no cop's touching my ride! I've read multiple news articles that stated it is nearly impossible for them to write citations for this as they have to break out a bunch of light equipment that shows that the beams are too high, too bright etc. Combined with the number of people running aftermarket headlights (at least in my area around Portland, OR) chances are you wouldn't ever get pulled over. Unless you're that ricer idiot that puts 15,000k blue HIDs in and aims them up. Been rolling with HID kits since before people even knew what HIDs were. Never had an issues or been pulled over for it. Projector or non projector housing. Just aim them properly, walk out and look / verify they aren't blinding and you'll be fine. Just put some LED 6500k 4000Lm bulbs in on my wife's Cmax and they look great.
-
-
Hey new C-Max owner. Was wondering if you can get a FOB for remote start (5 button FOB) on a C-Max that only has a 3 button FOB currently? Basically trying to figure out if I have remote start and just not a FOB to do it or Not. Any easy ways to tell if that feature is there?
Any info would be great.
Thanks
-
I've used this in 4 different vehicles. Works and looks great. This specific one, as they're are a lot of knockoffs with the same case but way worse chipsets advertised by other sellers on ebay/amazon.
https://www.amazon.com/gp/product/B015GQP020/ref=oh_aui_detailpage_o03_s00?ie=UTF8&psc=1
-
FYI you can tie into the purple and black wires in the rear view mirror power. 12V. Learned this trick on my colorado and camaro. Some minor crimping and soldering required.
-
I just put a K&N on my wife's 2016 C-MAX and did notice a little bit of pep. Also have run K&N in every vehicle I've owned including a 800HP Camaro ZL1 with zero problems. As long as you don't overoil them when you clean, you'll be fine.


Flickering MY FORD Center Display
in General Discussion
Posted · Edited by vonsche
Had this same issue. Was flickering, mainly when the vehicle was cold. I brought it to Ford while it was still under warranty and they replaced some module that was expensive for free. That stopped most of it. But noticed it still flickers when auto-dimming which is annoying as it switches back and forth like when going under a bridge or tunnel. Must be just poorly written code for "fading" the dim. Going to try turning this feature off as Telerisk suggested.