Search the Community
Showing results for tags 'CMax'.
-
I recently read that NHTSA.GOV has webpages of Technical Service Bulletins (TSBs) specific to vehicle year, manufacturer, and model. However, I didn't find them easily and emailed the webmaster for help. The reply states: "To look up Technical Service Bulletins (TSBs) which are known as Manufacturer Communications on our website go to NHTSA | National Highway Traffic Safety Administration click on the Recalls tab. Enter your vehicle's Year Make and Model, then click Search. Under the vehicle information, you will see a section for Manufacturer Communications click the Blue number. There you will find the Manufacturer Communications that have been issued for that year, make, and model." There is no search function for finding TSBs that are relevant to a particular vehicle problem on the NHTSA website. Therefore, I created a file which contains a brief description of the subject of each TSB for 2013 Ford CMAXs and the URL of the TSB. It can be searched for keywords by loading the file into any document software that has a search function. The file is attached for those who would care to use it to help diagnose the cause of CMAX problems. (Many of the TSBs were issued for a broad range of model years. (Although the NHTSA website has separate web pages for CMAX Energi models, many of the TSBs in my CMAX file also cover the CMAX Energi model.) In addition to the TSBs, the NHTSA website also provides webpages of complaints from owners about vehicles of specific year, manufacturer, and model. In the case of the 2013 Ford CMAX, a few failure modes were the subject of a large number of complaints. Among these is unexpected discharge of the 12 volt battery, which I have experienced repeatedly, and which a local Ford dealership has been unable to cure, notwithstand billing me hundreds of dollars for trying. Had I all the information available from NHTSA to show them, I suspect that at least I could have avoided paying the dealership for reprogramming all CMAX's module firmware, and perhaps been able to point them is a direction that would have led to success. (My workaround is to carry a voltmeter and 12V SLA "jumpstart" battery in the vehicle which I can use if stranded in a location where I can't plug in my battery charger.) 2013 FORD CMAX Technical Service Bulletin URLs & Brief Descriptions - NHTSA.GOV.txt
-
-
I have a CMAX energi 2014 I am selling. It is my wife's car. I am asking $9995. Located near Nashua NH. No issues with batteries, drive train, brakes, transmission. Only 60K miles. Has been in New England for 6 years so it would get the most usage if sold to someone south of New England -- otherwise we will see rust in 2-3 years. My spouse used this daily for a 10.5 mile commute. Comes with the owners manual and both keys. Besides the recalls, which we did, there was a 12v battery drain issue that was resolved by our dealer upgrading the software. Since that time (2 years ago), no issues at all with the vehicle. Freshly detailed. Includes two nice accessories made for this model: MaxLiner plastic floor mats in front seat, and a Curt 1 1/4" trailer hitch receiver in the back. you can contact me by text message at area-code-six-one-seven 6423379 if you are interested in this car. I have 15 more photos available. Thanks, Rich
-
Haven't had luck with any videos, forums, repair shops, etc. Decided to see if anyone here had a similar problem with a solution. Car: 2013 Ford C-Max Hybrid May 2019: Started making popping sounds randomly through the speakers even when stereo was turned off. When stereo was turned on and the popping happened, the sound would immediately stop working. Display still worked, buttons still worked, just no sound. This was quickly fixed by turning off the car and turning it back on. December 2019: Popping sound got worse. It was like a constant stream of pops at this point. The radio pretty much never worked at this point. Display and buttons still worked. January 2020: Popping stopped completely, but now the display doesn't respond to the buttons. Time and date are still on, but the stereo screen doesn't appear when I push the button. When I push the button a second time, there's this little animation that the screen would normally show when the stereo was being turned off. The rear parking sensor alert sound has also stopped working. I'm curious if this is a speaker issue... I've taken apart the system but haven't seen anything unusual or out of place. All fuses are working properly, too. The dealer hasn't been much help, and a couple independent repairs shops have said the model is "too unique" to know for sure if they can fix it. ? Please let me know if anyone has any ideas!
- 3 replies
-
- parking assist
- radio
-
(and 7 more)
Tagged with:
-
Can anyone tell me how to remove the cover of this fuse box after removing the door in the left side of the cargo area wall? Since the box is screw onto the wheel well, I can't see whether it comes off completely or how to release any latches holding it closed.
-
It was bound to happen someday, it took 4.5 yrs :) for me. Stopped at traffic light on 4 lane divided road with 45 mph speed limit and the road has only one straight ahead lane in about half mile with stop sign. I was planning to EV to 15mph and 2 Bar accelerate like normal and I should end up in front of Prius V for the single lane ahead. Apparently the Prius V driver misinterpreted my quick EV start, Prius V is sluggish from start so he floored it and started to pull ahead of me. Not what I expected, then I'm thinking are you kidding me, so I floored MADMAX and blew by the V almost like he was standing still, WOW when you see the difference acceleration side by side it's amazing. :yahoo: Paul
-
I have been Posting on CleanMPG.com Link: http://www.cleanmpg.com/community/index.php?threads/46762/ Complaining about a road test comparison done 4 yrs ago (old News I know), but I figured how they could have made the CMAX MPG's look bad by running the ICE all the time. The results were CMAX 35.5 mpg, Prius V 40.7 mpg and Prius 43.3 mpg on HWY trip from Carlsbad, CA to Pheonix, AZ. The thing that got my attn. was the CMAX display showed 359.7 mi. and only 24.1 mi. EV. That is 14% of the time and practically impossible to do. You would have to have a very strong head wind to have the ICE running all the time, and going down hill too. Also they didn't mention the gas mileage coming back. :headscratch: Wayne the Owner of CleanMPG.com suggested I do my own test so I was wondering if anyone would be interested in getting involved in this test.? I will add more to this as I have more time. :) BTW MPGomatic got these results with 14 day road test also 4 years ago.http://www.mpgomatic.com/2012/12/13/2013-ford-c-max-hybrid-gas-mileage-testing-notes/ Paul
-
Green Car Reports Posted MY CMAX video on How to drive FORD CMAX/FFH to get Great Gas Mileage. Link:http://www.greencarreports.com/news/1111028_how-to-drive-ford-c-max-hybrid-for-best-gas-mileage-owner-video-explains This is a Link to my video: https://www.youtube.com/edit?o=U&video_id=5uHoZ5QhVXs I put CMAX Forum info on my YouTube page. :) See if we can get some new members. :) Paul
-
I test drove top of line KIA NIRO Touring at Peoria KIA in Pheonix, AZ last week with mixed reviews . The NIRO only had 3 miles on it. Exterior looks nice, interior looks a little cheap for Top of the Line($33k) and didn't have rain sensing wipers or hands free automatic hatchback. It reminded me of an improved Prius V without the extra space, the EV Mode is gutless and above 40 mph the ICE is on all the time unless your gliding. It was nice at the end of trip it displays Trip Info: miles and MPG's average. I drove 16 miles with KIA Salesman, 7 HWY(65 mph on the 101Loop) and 9 mi City(35-45mph) getting 45.1 MPG average working on getting good MPG's. On the FWY the only way I could get the ICE to shut off was to glide. NIRO is noticeably lighter, but I don't think it handles better than My CMAX. As far as acceleration goes CMAX is in a class by itself. IMO NIRO Touring isn't as nice as my CMAX SEL. BTW I had 54 mpg average on my 2013 CMAX with about 75 mi. FWY and 25mi. City on this fill up when I test drove the NIRO. I drove a Prius V 2017 model 3 from Findley Toyota Flagstaff, AZ to try to have a up to date comparison with 2017 KIA NIRO Touring. The car seems nice, the suspension was a little stiffer than the NIRO and felt a little heavier not sure about the handling, it definitely accelerates slower than the Nero( some power is lost from being at 6900ft elevation) and of course no comparison to the CMAX. The car only had a few miles on it and after approx 7 mi.HWY/City Loop it's average was 44.5 mpg's. It's very obvious KIA was going after Prius owners, NIRO Salesman said Prius owners bought their NIRO's. IMO I don't think CMAX Owners would get much worse mpg's than NIRO and 2017 CMAX TITANIUM Is overall a better Hybrid experience. I wanted to compare a 2017 FORD CMAX Titanium to 2017 KIA NIRO Touring and 2017 TOYOTA Prius V Model 3 so I test drove one from AutoNation FORD just off I-85 FWY in Union City, GA. Weather Conditions weren't great with 55*F and rain, ( figured to loose 1 mpg from 8*F lower temp than NIRO Test and a couple from the rain but I decided to go ahead anyways. So I started down I-85 for 7 mi. got off FWY and took country roads( 55-45 mph) back to the Dealer for a total of 20.4 mi. I was pleasantly surprised to get 46.3 mpg's average with 10.7 EV miles, 52% of the miles. As it turned out there was KIA of Union City Dealer a couple of blocks down the street from AutoNation FORD so I got the chance to drive another NIRO Touring with Salesman, He sent me down SR 138 for 6 miles and turned around and came back, I wanted to go on I-85. Speed was 45-55mph with wet road, but no rain. The average for twelve miles was 37.9 mpg, I would have thought it would have been better. The drive was about half an hour after CMAX drive with dryer road conditions, no rain and no difference in wind conditions. Today I drove a 2017 KIA NIRO FE from Thornton Road Kia in Lithia Springs, GA for a 27 mi. test drive, temp 66*F/no wind, 10m. HWY and 17 mi., 35-40 mph City getting 54.4 mpg which is very good. BTW I don't like the tires, they don't inspire confidence under hard cornering like the CMAX and probably the Touring's wider tires. I was hoping to duplicate the route with my CMAX, but the roads the Salesman took me on aren't on my GPS's so I ended up driving SR's at 50-55mph for 28 mi, but still managed to get 55.3mpg., I think I lost about 5mpg because of the difference. :sad: At 35-40 mph I should be getting 65-80mpg, at 50-55mph, 55-65MPG. Bottom line My CMAX gets better MPG's than the the most fuel efficient KIA NIRO FE. :) So results are: 2017 FORD CMAX Titanium 46.3 mpg 2017 KIA NIRO Touring #1 45.1 mpg 2017 KIA NIRO Touring #2 37.9 mpg 2017 KIA NIRO FE 54.4 mpg 2017 TOYOTA Prius V Model 3 44.5 mpg MY 2013 FORD CMAX SEL 55.3 mpg NOTE* Manufactures Displays tend to be optimistic by varying amounts, CMAX odometer is understated by 1.6 to 2% which can increase MPG's by up to 1 mpg. Paul
-
I have about reached the limit for AERO and Temperature Efficiency Improvements like Grill Covers and Wheel Covers for my CMAX. With temps in the 80's*F I can average 50-54mpg at 65-70mph with no A/C on the HWY. Not bad, but I'm still looking to improve more. I remembered someone had said the ICE is very inefficient so I looked it up and to my surprise it is only 25-30% at best. WOW :drop: So looking at GOV site and Wikipedia http://www.fueleconomy.gov/feg/atv.shtml https://en.wikipedia.org/wiki/Engine_efficiency From Wikipedia: "Modern gasoline engines have a maximum thermal efficiency of about 25% to 30% when used to power a car. In other words, even when the engine is operating at its point of maximum thermal efficiency, of the total heat energy released by the gasoline consumed, about 70-75% is rejected as heat without being turned into useful work, i.e. turning the crankshaft.[1] Approximately half of this rejected heat is carried away by the exhaust gases, and half passes through the cylinder walls or cylinder head into the engine cooling system, and is passed to the atmosphere via the cooling system radiator.[2] Some of the work generated is also lost as friction, noise, air turbulence, and work used to turn engine equipment and appliances such as water and oil pumps and the electrical generator, leaving only about 25-30% of the energy released by the fuel consumed available to move the vehicle. In the past 3–4 years, GDI (Gasoline Direct Injection) increased the efficiency of the engines equipped with this fueling system up to 35%. Currently, the technology is available in a wide variety of vehicles ranging from less expensive cars produced by Mazda, Ford and Chevrolet to more expensive cars produced by BMW, Mercedes-Benz, and Volkswagen Auto Group." As you can see about 30% of the energy is absorbed by the cooling system from piston, cylinder walls and cylinder head and another 30% goes out the tale pipe. ;) :headscratch: This got me to thinking about using a material that has very low Thermal Conductivity and as it turns out I help to develop STAR21G, a black material with Thermal Conductivity of: 1.25 W/(m K) at 25*C, 160 times lower than Aluminum,34 times lower than Steel. Aluminum: 205 W/m K) at 25*C steel: 43 W/m K) at 25*C Here are the advantages that I can think of.: 1. Potential MPG improvement of two times. 2. Almost instantaneous operating temp, no energy being absorbed by combustion parts and lower pollution. 3. Eliminate the need for a cooling system there by saving the cost for having one, may need oil cooling. 4. Cut pollution in half by using half as much gas for each mile. 5. ICE cars will be cheaper to own and operate then All-electric Cars and create similar amount of air pollution assuming they use coal fired power to charge battery. 6. Hybrids could improve MPG's more if we can use exhaust gases to run a steam engine generator to charge HVB from using exhaust gases. 7. Would increase HP and Torque by a factor of two for the same ICE design. 8. There maybe more advantages and I will add when I or someone else comes up with them. I'm thinking 100 mpg/ 1400mi. on a tank with a CMAX Hybrid on the HWY for 2018. :shift: (Maybe 2K miles with Hypermiling) :yahoo: This isn't a cost effective solution for current CMAX/ICE vehicles, but for Future Hybrid/ICE vehicles this could be a huge improvement in MPG/HP/ Torque and cheaper to make. IMO anyway. I might try to add this to my ICE now that I'm out of warranty if I get the opportunity. (133K mi) :) It would be interesting if I could get someone at FORD interested in my idea otherwise I'm going to put this information out to the Public Outlets and see what happens. I have applied for a patent too. Let me know what you think. :) Paul
-
Hi, I just got my cmax energi last month and have 550 miles on it. I mainly use it on electric as i work close by. My dash reads about 128 mpg isn hat correct? it continues to go up every time i drive it. I thought 108 was the maximum the cmax could do. How high can it go? Also what about engine break in. Do i need to run the engine? How much? I just got a letter formoil change at 7500 miles is that combined or is there a way to see non-electric miles so i know when to do oil change? I think i used engine for maybe 20 miles so far. Should tHe engine be run once week? I mainly go to,places now that have level 2 charging. My ford dealer is near supermarket so i get a free charge while i shop. I charge overnight at home and may get level 2 charger. So far the one 110v charger that came with car is fine. Also can you use cmax with level 3 charger? Very happy with lease!! Saving $200 month in gas. Richard
-
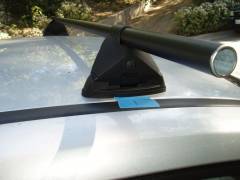
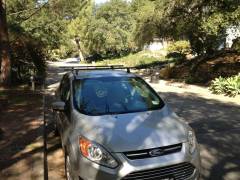
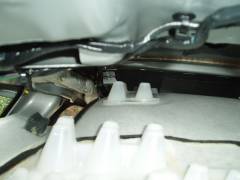
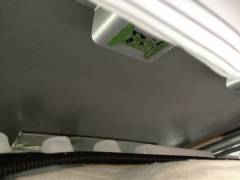
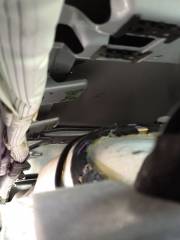
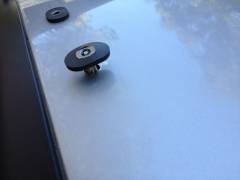
I installed a set of Yakima landing pads (landing pad 7) and control towers with 58" crossbars on my Cmax friday and yesterday (about 6 hours total, probably much less if I had to do it again). A bunch of fully captioned/descriptioned pictures are in an album in my media area, but I'll use the first post of this thread to do a full writeup of it. Most of the details are already in the captions, and I'll copy and expand on them here. [EDIT 3/1/14: The water tightness got tested in the latest rain storms that we finally got in SoCal this week. No sign of leakage at all] A few relevant details: Front Bar location: centered 11" back from the rear edge of the windshield glass Rear Bar location: centered 34" back from the center of the front bar (45" back from the windshield) Pad distance in from gutters (measured from center of the inner gap between the rubber and metal to the edge of the pad): about 0.5" (needs to be checked again, and probably should be a little further in to avoid internal roof structure pieces if you don't want to drop the headliner). The distance from the gutter edge to the hole centers is about 1.5" Most of it wasn't too difficult, but I took it pretty slow because it's a lot of disassembly (headliner) and some irreversible metal mods (drilling holes) in a brand new car. Here are the pictures, in order (I should have done step by step of the headliner teardown/reassembly, too, but didn't...) For removing the headliner, I started at the back and just yanked on the trim pieces (trying to pull near fasteners as I could feel them). I didn't fully remove any of the trim pieces-- most were left hanging by a lower clip. The overhead mounted stuff (handles, visors) all come out with Torx T15 screws, but be careful with the springy handles-- they can be tricky to manage on reassembly. All the screws were the same size, though I kept them with their trim pieces just in case. Reassembly went front to back, and is basically massaging pieces into place, making sure clips align with holes, then pressing. The tools: pencil masking tape measuring tape small flat bladed screwdriver T15 torx driver touch up paint hammer center punch (to set drill hole locations) electric drill 1/8" drill bit 1/4" drill bit 25/64" drill bit deburring tool drill stops (made from PVC pipe) flexible video inspection scope (useful, not required) Headliner down from behind: Headliner down from the front, along the edge: Pics of things that can interfere with the install: Holes marked and punched: Holes drilled and the deburring tool. Use a hard drill stop like the PVC pipe I used. With larger drill bits, they can screw in and push a wrap of tape before you know it's happened (happened once, but with the headliner down it didn't cause any trouble). I gave them 0.25-0.5" to drill with. The sheet metal is thin, so 1/4" is plenty. Holes touched up with paint: Blind nuts (one installed, one on roof): Blind nuts-- I had to install in this orientation and then turn, and in some cases reach underneath to turn the nut in the carrier to avoid the internal rail. Two of them butted against the rail and deformed the carrier before I realized that's what was happening, so I had to insert the nuts from underneath by hand for those two (dropping them and looking for where they slid in the rails was very time consuming-- details in the picture descriptions). The next steps I didn't photograph because it's kind of messy with the silicone RTV, but it's exactly as described in the Yakima instructions: put a bead of silicone RTV (included with the landing pads) across the top of the nut gasket, then install the landing pad (thin base and plastic upper) over it and tighten. For the ones I had to insert from underneath by hand, it was easiest to partly drop the bolt in and then reach underneath to feel the bolt location with the nut. Here are close ups of the loose nuts. If you have to install them loose, the asymmetric side that's flat around the threaded hole faces the sheet metal: This is the back of the nut- it's symmetric and rounded around the threaded hole. This side faces away from the sheet metal: Front crossbar installed, with tape marking the center location so I can locate the rear bar: Almost finished-- all installed but I still have to reinstall the headliner.
- 15 replies
-
- yakima
- landing pad
-
(and 2 more)
Tagged with:
-
From the album: yakima rack install
A closeup of the front crossbar after installation. I marked the center with a mark on tape so I could locate the rear crossbar with respect to it.-
- landing pad
- yakima
-
(and 1 more)
Tagged with:
-
From the album: yakima rack install
Here's an almost finished picure of the installation. You can see that the overhead console and visors are still hanging down because I haven't replaced the headliner yet.-
- yakima
- landing pad
-
(and 1 more)
Tagged with:
-
From the album: yakima rack install
I think this is one of the beam at the front that the visors mount to (you can see the edge of the clip for the free end of the visor).-
- yakima
- landing pad
-
(and 1 more)
Tagged with:
-
From the album: yakima rack install
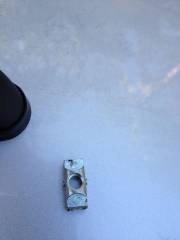
Here's a picture of one of the nuts that separated from the carrier. If they separate and you have to insert them by hand, this side (with symmetric cutouts) faces down away from the sheet metal.-
- yakima
- landing pad
-
(and 2 more)
Tagged with:
-
From the album: yakima rack install
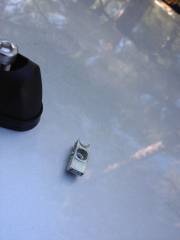
Here's a picture of one of the nuts that separated from the carrier. If they separate and you have to insert them by hand, this side (with asymmetric cutouts) faces up against the sheet metal.-
- yakima
- landing pad
-
(and 2 more)
Tagged with:
-
From the album: yakima rack install
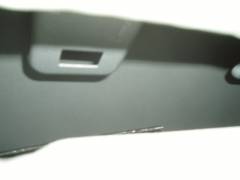
Another view of the inside roof, showing how there are various ledges a little below the roof that can interfere with the blind nut insertion.-
- yakima
- landing pad
-
(and 2 more)
Tagged with:
-
From the album: yakima rack install
Another view of the inside roof, showing how there are various ledges a little below the roof that can interfere with the blind nut insertion.-
- yakima
- landing pad
-
(and 2 more)
Tagged with:
-
From the album: yakima rack install
A view inside the space between ceiling and headliner from the back. You can see the side curtain airbag on the left, and the big crossbeam that limited the bar spacing running across the roof.-
- yakima
- landing pad
-
(and 2 more)
Tagged with:
-
From the album: yakima rack install
Another view inside the headliner. You can see the rolled up airbag in the foreground, and the handle mounts above it.-
- yakima
- landing pad
-
(and 2 more)
Tagged with:
-
From the album: yakima rack install
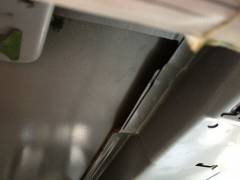
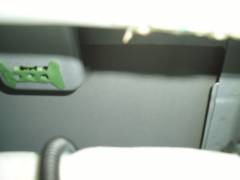
This is a view from front to back along the inside edge with the headliner dropped. You can see the side curtain air bag rolled up, and the mounts for the passenger visor (black clips in front) and the passenger roof handles (green clips). Further back you can see the cross beam that's 45" back from the windshield glass that limited how far back the rear rail could go. The mounts hang from a rail that's about 1/2" (just big enough for fingers to reach in) below the roof. When I dropped the nuts that separated from their carriers, one ended up in the "basin" by the clips for the passenger visor. the other ended up trapped between the roof and a beam that runs above the basin (not visible without a scope). I had to use the video scope to find and recover it.-
- yakima
- landing pad
-
(and 2 more)
Tagged with:
-
From the album: yakima rack install
In order to clear the rail, I inserted the nuts as seen in the one that's partially inserted and then turned them. A few of them I had to reach in and rotate the nut in the carrier from underneath as I was inserting them. After they're through the roof and rotated in the carrier, I turned them so the long edge of the gasket runs front to back.-
- yakima
- landing pad
-
(and 1 more)
Tagged with:


